
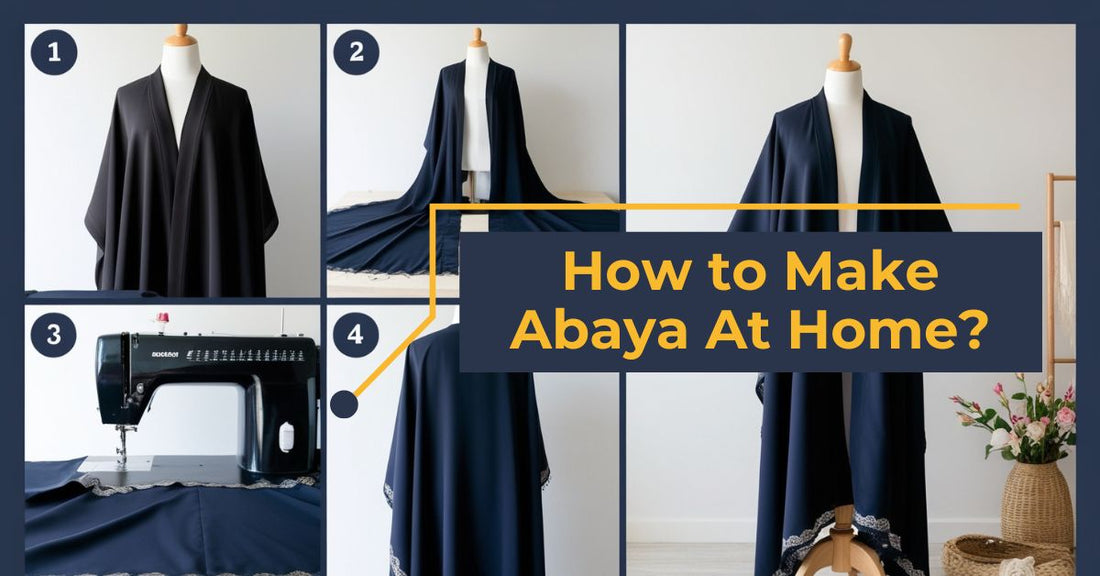
Making an abaya at home is easier than you think. You only need a few materials and some basic sewing skills.
An abaya is a traditional, elegant garment worn by many women in different cultures. Creating one at home can be a rewarding project, offering a chance to personalize the design and fit to your taste. Whether you are an experienced seamstress or a beginner looking for a new challenge, making an abaya can be a fulfilling and practical endeavor.
In this guide, we will walk you through the process step-by-step. From selecting the right fabric to sewing the final stitch, you will learn how to create a beautiful abaya that reflects your style. Ready to start? Let's dive into the details!
Materials Needed
Making an abaya at home can be a rewarding and creative project. To start, it is essential to gather the necessary materials. This step is crucial for ensuring your abaya looks professional and elegant. Let's explore the fabric choices and sewing tools you will need.
Fabric Choices
Choosing the right fabric is fundamental to making a Beautiful Abaya. The fabric you select will determine the comfort, drape, and overall look of your garment. Here are some popular fabric options:
-
Chiffon: Lightweight and sheer, perfect for a flowing and elegant abaya.
-
Crepe: Known for its crinkled texture, crepe is durable and drapes well.
-
Satin: Offers a glossy finish and a smooth texture, ideal for special occasions.
- Jersey: Stretchy and comfortable, suitable for casual wear.
In addition to choosing the type of fabric, consider the color and pattern. Solid colors like black, navy, and beige are traditional and versatile. If you prefer a modern look, you can choose printed fabrics with floral or geometric designs.
When purchasing fabric, it's important to buy enough material. Typically, 2.5 to 3 meters of fabric is required for a standard abaya. This measurement can vary based on your height and the style of the abaya.
Here's a quick reference table for fabric types and their characteristics:
|
Fabric Type |
Characteristics |
|
Chiffon |
Lightweight, sheer, drapes well |
|
Crepe |
Crinkled texture, durable, good drape |
|
Satin |
Glossy finish, smooth texture |
|
Jersey |
Stretchy, comfortable, casual |
Sewing Tools
Having the right sewing tools is essential for making an abaya at home. Quality tools make the sewing process easier and result in a professional finish. Here is a list of essential sewing tools:
-
Sewing Machine: A basic sewing machine is sufficient. Ensure it has straight and zigzag stitch options.
-
Scissors: Sharp fabric scissors are crucial for clean cuts. Avoid using them on paper to maintain sharpness.
-
Measuring Tape: A flexible measuring tape helps in taking accurate body measurements.
-
Pins and Pin Cushion: Pins hold the fabric in place while sewing. A pin cushion keeps them organized.
-
Seam Ripper: Useful for correcting mistakes and removing stitches.
-
Iron and Ironing Board: Pressing seams and fabric pieces ensure a polished look.
-
Thread: Match the thread color with your fabric. Quality thread prevents breakage.
- Pattern Paper: Used for drafting and cutting patterns to ensure accuracy.
In addition to these tools, having a dedicated workspace is beneficial. A large table for cutting fabric and assembling pieces can make the process smoother.
Remember, the better your tools, the easier your sewing experience will be. Investing in good quality tools can save you time and effort in the long run.
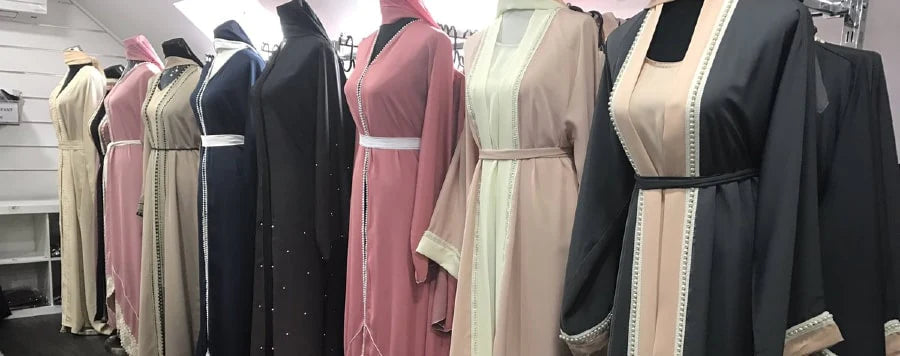
Choosing A Design
Creating an abaya at home can be a rewarding and creative project. One of the first steps in making your own abaya is choosing a design. This decision will guide the entire process, from selecting fabric to the final stitching. Let's explore traditional styles and modern variations to help you Decide On The Perfect Design For your Abaya.
Traditional Styles
Traditional abayas often feature simple yet elegant designs. These styles are timeless and have been worn for centuries. They provide a classic look that never goes out of fashion. Here are some key elements of traditional abayas:
- Loose Fit: Traditional abayas are typically loose-fitting, providing comfort and modesty.
- Solid Colors: Black is the most common color, but other solid colors like navy, brown, and white are also popular.
- Minimal Embellishments: Traditional abayas often have minimal embellishments, focusing on simplicity. Sometimes, they include subtle embroidery or beadwork around the neckline or cuffs.
Some popular traditional styles include:
|
Style |
Description |
|
Classic Black Abaya |
A long, loose-fitting garment, usually black, with minimal or no embellishments. |
|
Embroidered Abaya |
A traditional abaya with subtle embroidery on the cuffs, neckline, or hem. |
|
Kaftan Abaya |
A long, loose robe, often with wide sleeves and intricate designs. |
Choosing a traditional style can be a great way to honor cultural heritage while ensuring your abaya is versatile and elegant.
Modern Variations
Modern abayas offer a range of styles that cater to contemporary tastes. These variations blend traditional elements with modern trends, providing a fresh take on this classic garment. Here are some features of modern abayas:
-
Fashionable Cuts: Modern abayas can have tailored fits, flared bottoms, or asymmetrical designs.
-
Vibrant Colors: Unlike traditional abayas, modern versions come in a variety of colors and patterns.
- Bold Embellishments: Modern abayas often feature bold embroidery, sequins, and other embellishments.
Some popular modern styles include:
|
Style |
Description |
|
Open Abaya |
An abaya that opens in the front, often worn over other clothing, like a coat. |
|
Kimono Abaya |
A modern style with wide, kimono-like sleeves and a looser fit. |
|
Layered Abaya |
An abaya with multiple layers of fabric, creating a textured look. |
Modern variations of abayas allow for personal expression and can be styled to suit any occasion, from casual outings to formal events.
Taking Measurements
Making an Abaya at home can be a rewarding and creative experience. One of the most crucial steps in this process is taking accurate measurements. Proper measurements ensure that the Abaya fits well and looks elegant. Below are detailed steps to help you take the necessary measurements.
Body Measurements
Accurate body measurements are essential for a well-fitting Abaya. Start with these key areas:
- Bust: Wrap the measuring tape around the fullest part of your bust. Ensure it is parallel to the floor.
- Waist: Measure around the narrowest part of your waist. Usually, this is just above the belly button.
- Hips: Measure around the widest part of your hips. Keep the tape level and snug but not tight.
Use the table below to record your measurements:
|
Body Part |
Measurement (in inches) |
|
Bust |
_____ |
|
Waist |
_____ |
|
Hips |
_____ |
Other important measurements include:
-
Shoulder Width: Measure from one shoulder end to the other.
-
Sleeve Length: Measure from the shoulder seam to the wrist.
- Armhole: Measure around the arm where the sleeve will attach.
Recording these measurements accurately will guide you in creating a well-fitted Abaya.
Length And Width
Determining the length and width of your Abaya is just as important as the body measurements. Here’s how to do it:
-
Abaya Length: Measure from the top of your shoulder to the desired hemline. This could be ankle-length or floor-length, depending on your preference.
- Width: Measure the desired width of the Abaya at the bottom. This will depend on how loose or fitted you want the Abaya to be.
For a comfortable fit, consider adding some ease to your measurements. Ease refers to the extra space added to allow for movement and comfort. Typically, you might add 2-4 inches around the bust, waist, and hips.
Use the table below to record your length and width measurements:
|
Measurement Type |
Measurement (in inches) |
|
Abaya Length |
_____ |
|
Abaya Width |
_____ |
Ensure the measurements are accurate and double-check them before cutting the fabric. Proper measurements will help you achieve a well-fitted and elegant Abaya.
Cutting The Fabric
Making an Abaya at home can be a rewarding and creative process. One of the most crucial steps is cutting the fabric. This step sets the foundation for the entire garment, ensuring it fits well and looks beautiful. Proper cutting techniques and pattern making are essential to achieve a professional finish. Let's explore how to do this effectively.
Pattern Making
Creating a pattern is the first step in making an Abaya. This pattern will serve as a guide for cutting the fabric. Here is a simple way to make a pattern:
Materials Needed:
- Pattern paper or any large paper
- Measuring tape
- Pencil
- Ruler
- Scissors
Steps to Create the Pattern:
-
Measure: Take accurate measurements of the body. Measure the bust, waist, hips, and the length of the Abaya.
-
Draw the Outline: On the pattern paper, draw a vertical line equal to the length of the Abaya. At the top, mark the shoulder width. From this point, draw the neckline and the armholes.
-
Shape the Abaya: Connect the bust, waist, and hip measurements to form the body of the Abaya. Ensure smooth curves for a flowing design.
-
Add Seam Allowances: Include a seam allowance of about 1 inch on all sides. This extra fabric is necessary for sewing the pieces together.
- Cut the Pattern: Carefully cut out the pattern pieces. You should have a front piece, a back piece, and sleeve pieces.
Cutting Techniques
Once the pattern is ready, the next step is to cut the fabric. Proper cutting ensures the Abaya fits well and looks neat. Here are some tips for cutting the fabric:
Materials Needed:
- Fabric (preferably a lightweight, flowing material)
- Fabric scissors
- Pins
- Chalk or fabric marker
- Measuring tape
Steps for Cutting:
-
Prepare the Fabric: Lay the fabric on a flat surface. Ensure it is smooth and free of wrinkles. Fold the fabric in half with the right sides facing each other.
-
Place the Pattern: Position the pattern pieces on the fabric. Pin them in place to prevent shifting. Ensure the grainline on the pattern aligns with the fabric grain.
-
Trace the Pattern: Use chalk or a fabric marker to trace around the pattern pieces.
Mark all important points such as notches, darts, and seam allowances.
-
Cut the Fabric: Carefully cut along the traced lines. Use sharp fabric scissors for clean cuts. Follow the traced lines precisely to avoid altering the pattern.
- Check Pieces: After cutting, check all fabric pieces. Ensure they match the pattern and each other. This step helps in avoiding mistakes during sewing.
By following these steps, you can cut the fabric accurately, making the sewing process smoother and the final Abaya more elegant.
To Get The Best Abaya - Visit Our Shop
Sewing Basics
Making an Abaya at home can be a rewarding experience. Understanding the sewing basics is crucial to ensure a beautiful and well-made garment. In this section, we will cover the fundamental stitch types and sewing techniques required to create your own Abaya. Let's dive in!
Stitch Types
Knowing the basic stitch types is essential for sewing an Abaya. Here are a few important ones:
- Running Stitch: This is the simplest and most common stitch. It is used for basting and gathering fabric.
- Backstitch: This stitch is strong and secure. It is ideal for seams that need extra durability.
- Slip Stitch: This nearly invisible stitch is perfect for hemming and closing seams.
- Zigzag Stitch: This stitch is used to prevent fabric edges from fraying and to attach elastic.
Here is a table summarizing the stitch types and their uses:
|
Stitch Type |
Uses |
|
Running Stitch |
Basting, gathering |
|
Backstitch |
Durable seams |
|
Slip Stitch |
Hemming, closing seams |
|
Zigzag Stitch |
Prevent fraying, attach elastic |
Using the right stitch for each part of your Abaya is important. Practice these stitches on scrap fabric before starting your project.
Sewing Techniques
Mastering basic sewing techniques will help in making a professional-looking Abaya. Here are some key techniques:
-
Seam Finishing: Finish seams to prevent fraying. Use techniques like zigzag stitching or using pinking shears.
-
Hemming: Create a clean edge at the bottom of your Abaya. Fold the fabric twice and sew a straight line.
-
Pressing: Press seams flat with an iron after sewing. This makes the garment look neat.
- Gathering: Use a running stitch to gather fabric. Pull the thread to create ruffles or pleats.
Here is a brief overview of each technique:
|
Technique |
Description |
|
Seam Finishing |
Prevent fraying with zigzag stitching or pinking shears. |
|
Hemming |
Create a clean edge by folding fabric twice and sewing. |
|
Pressing |
Press seams flat with an iron for a neat appearance. |
|
Gathering |
Use a running stitch to create ruffles or pleats by pulling the thread. |
Following these sewing techniques will ensure your Abaya looks professional and beautiful. Practice these techniques to gain confidence and improve your sewing skills.
Adding Embellishments
Creating an abaya at home can be a rewarding experience. Adding embellishments can make your abaya unique and beautiful. Simple decorations like lace, beads, and embroidery can transform a plain garment into something special. Let's explore some ways to add these embellishments to your homemade abaya.
Lace And Beads
Lace and beads can add elegance and sparkle to your abaya. Here are some steps to add lace and beads:
Choose the Right Lace: Select lace that complements the fabric of your abaya. You can opt for delicate floral lace or intricate designs.
Position the Lace: Place the lace along the edges of the sleeves, hemline, or neckline. Pin it in place to ensure it stays secure while sewing.
Sew the Lace: Use a sewing machine or hand stitch to attach the lace. Make sure to use matching thread for a seamless look.
Beads can be added alongside lace or on their own. Here’s how to do it:
- Choose Beads: Select beads that match the color and style of your abaya. Glass, pearl, or crystal beads work well.
- Plan the Design: Sketch a pattern or layout for your beads. This can be simple lines or intricate designs.
- Sew the Beads: Use a needle and strong thread to sew each bead in place. Knot the thread securely to ensure the beads do not fall off.
Incorporating lace and beads can elevate the look of your abaya. It adds a touch of sophistication and personalization.
Embroidery Options
Embroidery is another way to embellish your abaya. There are various embroidery options you can consider:
|
Type |
Description |
|
Hand Embroidery |
Creates intricate designs using needle and thread. Requires time and patience but offers a personal touch. |
|
Machine Embroidery |
Uses an embroidery machine to create designs quickly. Suitable for larger patterns and uniform stitches. |
|
Iron-On Patches |
Easy to apply. Available in various designs. Great for beginners or adding quick decorations. |
Hand embroidery can be done using various stitches:
- Backstitch: Good for outlines and simple patterns.
- French Knots: Adds texture and dimension.
- Chain Stitch: Creates flowing lines and curves.
For machine embroidery, follow these steps:
-
Choose a Design: Select or create a digital embroidery pattern.
-
Prepare the Fabric: Hoop the fabric to keep it taut.
- Embroider: Use the machine to stitch the design. Follow the machine’s instructions for best results.
Iron-on patches are the easiest option. They are perfect for quick enhancements. Simply place the patch on the abaya and use an iron to secure it.
Embroidery can add intricate details and make your abaya look professionally made. Choose the method that best suits your skills and the style you want.
Finishing Touches
Making an Abaya at home is a rewarding experience. The process does not end after stitching the fabric. The final steps, or finishing touches, are crucial for a polished look. These steps ensure your Abaya looks neat and professional.
Hemming
Hemming is an important finishing touch. It prevents the fabric from fraying and gives a neat edge. Follow these steps to hem your Abaya:
- First, fold the edge of the fabric by half an inch.
- Press the fold with an iron to make a crease.
- Fold the fabric again by another half inch.
- Press the second fold with the iron.
- Pin the folded edge in place.
- Sew along the edge using a straight stitch.
Here's a quick reference table to help you:
|
Step |
Action |
|
1 |
Fold the edge by half an inch |
|
2 |
Press the fold with an iron |
|
3 |
Fold again by another half inch |
|
4 |
Press the second fold |
|
5 |
Pin the fold in place |
|
6 |
Sew along the edge |
Use thread that matches the fabric color. This helps the hem blend in. Take your time to make sure the stitches are even. A well-done hem adds to the overall look of the Abaya.
Final Adjustments
Final adjustments give your Abaya a finished look. Here are some steps to follow:
- Check for loose threads and trim them.
- Ensure all seams are secure and strong.
- Press the entire Abaya with an iron to remove wrinkles.
- Check the fit. Make any necessary adjustments to the size.
- Add any embellishments like embroidery or beads if desired.
Pay attention to details. Small adjustments can make a big difference. For example, make sure the neckline is even and the sleeves are the same length.
Here are some tips for common adjustments:
Neckline: Use a fabric marker to adjust the shape if needed.
Sleeves: Measure both sleeves to ensure they match.
Embroidery: Add hand-stitched embroidery for a personal touch.
Final adjustments ensure your Abaya fits well and looks beautiful. Take your time with these steps. The effort you put into the finishing touches will show in the final garment.

Care Instructions
Creating your own abaya at home can be a delightful experience. Once you have your unique piece, knowing how to care for it is essential. Proper care ensures your abaya remains elegant and lasts longer. Here are some detailed care instructions to keep your handmade abaya in pristine condition.
Washing Tips
Washing your abaya correctly is crucial for maintaining its beauty. Here are some tips to help you:
-
Read the Label: Always check the fabric care label for specific washing instructions.
-
Hand Wash: Hand washing is gentle and helps preserve the fabric.
-
Cold Water: Use cold water to prevent color fading and fabric shrinking.
-
Mild Detergent: Use a mild detergent to protect the fabric. Harsh detergents can damage delicate materials.
-
Avoid Bleach: Do not use bleach as it can ruin the fabric and color.
-
Gentle Cycle: If using a machine, select the gentle or delicate cycle.
- Separate Colors: Wash dark and light colors separately to avoid color transfer.
Here is a simple table for quick reference:
|
Action |
Details |
|
Hand Wash |
Recommended |
|
Water Temperature |
Cold |
|
Detergent |
Mild |
|
Bleach |
Avoid |
|
Machine Wash |
Gentle Cycle |
|
Color Separation |
Separate Dark and Light |
Storage Advice
Proper storage keeps your abaya in excellent condition. Follow these simple steps:
- Hang Properly: Use a padded hanger to prevent shoulder marks.
- Avoid Sunlight: Store your abaya in a cool, dark place to prevent fading.
- Breathable Cover: Use a breathable garment bag to protect from dust and moisture.
- Do Not Overcrowd: Give your abaya space to avoid wrinkles and damage from other clothes.
- Fold for Travel: If traveling, fold your abaya carefully and place it in a suitcase to prevent creases.
Here is a quick storage checklist:
|
Storage Tip |
Details |
|
Hanger Type |
Padded |
|
Sunlight Exposure |
Avoid |
|
Garment Bag |
Breathable |
|
Closet Space |
Do Not Overcrowd |
|
Travel Storage |
Fold Carefully |
Following these washing and storage tips will help you maintain your handmade abaya, keeping it beautiful and lasting for years.
Frequently Asked Questions
What Materials Are Needed To Make An Abaya?
To make an Abaya, you'll need fabric, a sewing machine, thread, scissors, and measuring tape. Choose a fabric like crepe, chiffon, or cotton for comfort. Ensure you have matching thread to the fabric color.
How Do I Take Measurements For An Abaya?
Taking measurements for an Abaya involves measuring the length from shoulder to desired hem. Also, measure the bust, waist, and hips. Record these measurements accurately for a perfect fit.
What Is The Best Fabric For An Abaya?
The best fabrics for an Abaya are crepe, chiffon, and cotton. These fabrics are comfortable and drape well. They offer a modest yet stylish look.
Can Beginners Sew An Abaya At Home?
Yes, beginners can sew an Abaya at home. Start with a simple pattern and follow step-by-step instructions. Practice basic sewing techniques to ensure a neat finish.
Conclusion
Creating your own Abaya at home is fulfilling and fun. With the right materials, you can customize it to fit your style. Follow simple steps and take your time. Enjoy the process of sewing and designing. Your homemade Abaya will be unique and special.
Share your creation with friends and family. Inspire others to make their own. Happy sewing!